Wednesday, 9 March 2022

Happy 50th Birthday John!


Last week was my husbands 50th Birthday! So a big huge Happy Birthday to him!

Dudley came floating in on his birthday balloon to save the day and make this awesome birthday card.

I created my own background for this card using the statement Chevron Background rubber stamp die.  I's huge and is perfect to create a bold background with.  Even with all of my embellishments it still stands out.


Here's a list of all of the other Whimsy goodies that I used to create this birthday card.


I coloured Dudley using Spectrum Noir Illustrator makers.


Thanks for popping over and taking a look.

I hope you have a wonderful day.

Love Lu xx


Thursday, 3 March 2022

Magical Birthday Wishes


Hi there!

I can't believe its March already and have I got lots to show you this month!  I'm so excited!

The slimline card that I'm sharing with you today is always going to be one of my favourites, its colourful, has lots going on, uses a bit of technique, lots of products and most of all was an absolute joy to create.  


How did I create this card.....

I took a piece of card the same size as the outer edge of the slimline clouds die set and covered it using Harmony water reactive inkpads Honey Pot, Spring Meadow & Parakeet.  Just to add texture, I then flicked a wet paint brush over the card and dabbed it dry.  I also flicked sparkle glitter pens Soft Jade, Moonstone and Crystal Clear over the card.  Once it had all dried I also added stars using a white gel pen.

Whilst that piece was drying I took another piece of card and ran it through my die cutting machine with the Slimline Clouds Die Set.  I then passed it through again but this time I lined up the scalloped die from the Slimline Fancy Frame Die, this created my white frame with stitched edging.

I then stamped the train and carriages from the Linking Train stamp set and coloured them using my copic markers for the grey areas and SN markers for the blues.  Next I stamped the unicorns from the Unicorn Wishes stamp set and coloured those using SN markers.  With a cup of tea and a good movie, I sat and cut out everything that I'd coloured.  I also stamped out the train track 3 times being careful to line it up and cut this out too.

When I was happy with the placement of all of the elements I glued and foam padded everything in place.  I even used the fantastic extra elements of balloons and lollie pops from the Unicorn Wishes stamps. Next I stuck the white frame down and then stamped the sentiments (actually, I stamped the sentiments before I stuck the carriages down - that's a top tip!)

To finish this bright and fun card, I mounted to a card blank and then added a few clear gem stones.  Lets also not forget, this beautiful card needed its own envelope, so I used the envelope maker die to make a matching envelope.  (no picture here because I always forget to do that!)

Here's a shopping list for you:


Saturday, 19 February 2022

Many Hoppy Returns!


I promised more bunnies this week didn't I!  With this card I decided to play around with technique too.

I stamped a few balloons across my card and drew a faint line to divide sky and grass.  I then took my markers and laid down the ink, blues for the sky and greens for the grass.  I applied scribbles randomly and overlapping.  I then took some blending solution to a pipet and kept dropping and dabbing until a bokeh effect was achieved.  Top tip here - let the solution dry in between droplets, it can take a bit of time but worth the effort.

I then stamped two sets of bunnies and coloured and cut them out.  Before sticking my family of bunnies down, I coloured the balloons in the background.

Here is a list of all the products used - 


Thursday, 17 February 2022

A Hoppy Birthday to you!


Have I got a cute little card today.  I know I use that word a lot but seriously, these bunnies are so cute and I've more than one card to show you this week using them.

This gorgeous stamp set is from Whimsy Stamps and I've listed everything I've used below.  

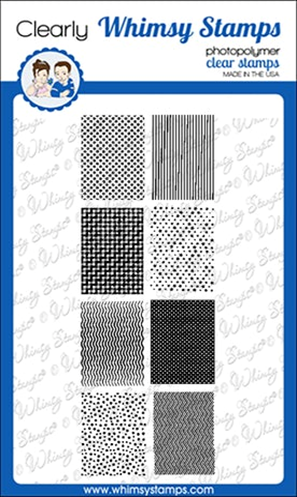
It's a simple slimline card however coupling together with the micro patterns stamps I have created my own background papers.  These little stamps are so versatile and easy to line up to create some wonderful backgrounds, there is so much more fun I will be having with these.

I've used Spectrum Noir Illustrators to colour my images and a white gel pen to add highlights to the balloons.


Friday, 11 February 2022

High Maintenance! Grouchy Pets


Hello my crafty friends!

Today is the second day of sponsorship from CC Designs to Passionate Paper Creations & Friends!


What you really want to do is go join the PPCF face book page and go get your 20% discount code!!  Just click on the banner above and it'll take you right there!

I am a huge fan of CC Designs and a huge fan of this new stamp set, seriously sassy, grumpy cats & dogs called Grouchy Pets.  Honestly you'll love them!

I decided to work with the Poodle for this shaker card, nothing says high maintenance quite like a Poodle and a pink one at that! Really!!!

So what did I do here - 

I have a bunch of new craft products that I wanted to use so really needed to get it all out and make 1 card to satisfy my itch to use everything at least once!

I cut two pieces of watercolour cardstock, roughly 12cm by 15cm just big enough for my heart die to fit onto.  Trying to keep the two pieces identical I inked them using Pink Tulip, Fuchsia and Plum Jam Harmony Water Reactive inkpads.  I then took a small paint brush and flicked both pieces with water and dabbed them dry with a cloth.  The next stage was to flick both pieces with my SN Sparkle glitter pens, watered down Plum Jam ink and finally a little white acrylic paint.   I then set these two pieces aside to dry and then stamped my image and got busy colouring.

I used SN Illustrators & Copic Marker Pens and added some white gel pen for highlights.  I then cut the image out and set to one side.

Taking one of the pieces of inked card I placed my heart background die over it and popped it thorough my die cutting machine.  I've kept those little hearts for another project and used the remaining overlay for this card.  Taking the second piece of card, I cut it to the same size as the piece I put through my machine.  We need to be able to glue one on top of the other.  I then cut a piece of clear wrapper big enough to wrap around the card.  I overlayed the card and firmly stuck it down with red tape around the back but not too tight around the card because I added shaker elements and we want those to move around freely.  This has now formed the corner to corner shaker/flat shaker.  Take your die cut piece of card and add wet glue to all of the spaces and stick it your shaker part.  You might want to add something heavy for five minutes to help it stick down.

I found some pink bakers twine and wrapped this once around the bottom third of the card and then with foam pads added the coloured Pink Poodle and sentiment.  I then stuck the panel to my card blank.

Hey presto! We have a pink poodle shaker card suitable for any of your sassy friends for any occasion.

Thank you so much for popping by.

Have a great day!

Love Lu xx
 

Tuesday, 8 February 2022

You are loved!


I've had this gorgeous image coloured up for some time, its right on the top of my stash of coloured images. (we all have a box like that don't we!)  Just waiting to be popped onto the perfect card.

I rarely plan my cards ahead of time, so unfortunately don't have many pictures of progress (nothing new there!)

So, as usual, I'll list the products I used and even give you the links to where you can find them.

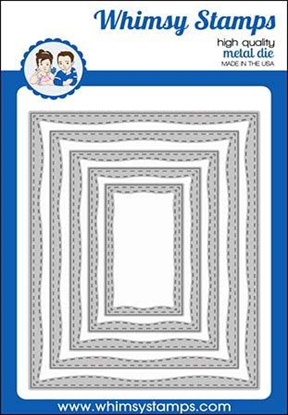
For the patterned paper I used the Micro Pattern Stamp Set and stamped one of the designs carefully onto cream cardstock.  I then die cut this piece using the largest die from the Wonky Rectangle die set and set this aside.

Next I took some scrap pieces of white cardstock and ran them through my die cutting machine using the stitched cloud and grass dies from the Grass and Cloud Edger Dies.  Once I had my cut pieces, I then inked the cardstock green for the grass and gently edged the clouds with blue ink.  I also took a larger piece of white card and inked it up with blue ink.

I placed my clouds and grass on the blue piece to decide where I wanted everything to be and tacked them into place.  I then took the next size down from the Wonky Rectangle die set and tacked that into place before popping them all through my machine for one smooth cut.

I then assembled the card using foam pads to lift the clouds and tucking the fox image under the grass a little.

I die cut the sentiment 'loved' three times and stuck them together.  This always adds dimension and in my opinion looks better.  I stamped 'you're' directly to the white card.

Thank you for popping over.

I hope you have a great day!

Love Lu xx


Wednesday, 26 January 2022

Let's cuddle up!


Some links in the post are affiliate links.  At no additional cost to you, I will earn a commission if you click through and make a purchase.  Click highlighted words or the images at the end of this post for the products.  

Hello!  Today I'd like to share with you a cute little shaker card using many Whimsy Stamps favourites.

It's still very cold here in the UK but my daffodils are sprouting and the Sun is pushing through the clouds, so this might be my last wintery card, although if I'm honest this does kind of give a warm fuzzy feeling.

Firstly I die cut a rectangle using the largest die from the Wonky Rectangle Die set, I did this using white cardstock.   I wanted a little frame around this so I mounted it to a piece of design paper from the Whimsy Chilly 6 by 6 paper pad. I gave it about a 2 mm border.

Next I stamped the frame from the Doodle Frame Stamp Set and also cut it out using the co-ordinating die set.  I then adhered a piece of acetate to the back of the frame.  Taking the co-ordinating die frame, I also cut a whole piece from the design papers.  This created the background for my shaker window.  I used large sequins in this shaker card so had to make sure I used thick foam pads to stick everything together.

Taking the cute little cup and marshmallow stamps from the Marshmallow Wishes stamp set, I stamped it onto Neenah Cardstock and coloured the image using Spectrum Noir Illustrators, I didn't keep a record of the colours used!  I then cut the image out.

Now I've got all my elements, I took one of the sentiment stamps from the Marshmallow Wishes set and stamped to the front of my card and then added/adhered the shaker element.  

This makes for a very quick and easy interactive card.

Here are all of the products and links:


Hope you have a great day!

Love Lu xx